The following provide instructions on how to configure Microsoft Edge and Google Chrome for use with RITS.
A number of website addresses should be added to your list of Trusted Sites.
- From the Windows Control Panel, select Internet options.
- Select the Security tab from the top row.
- Select the Trusted sites zone (the green tick).
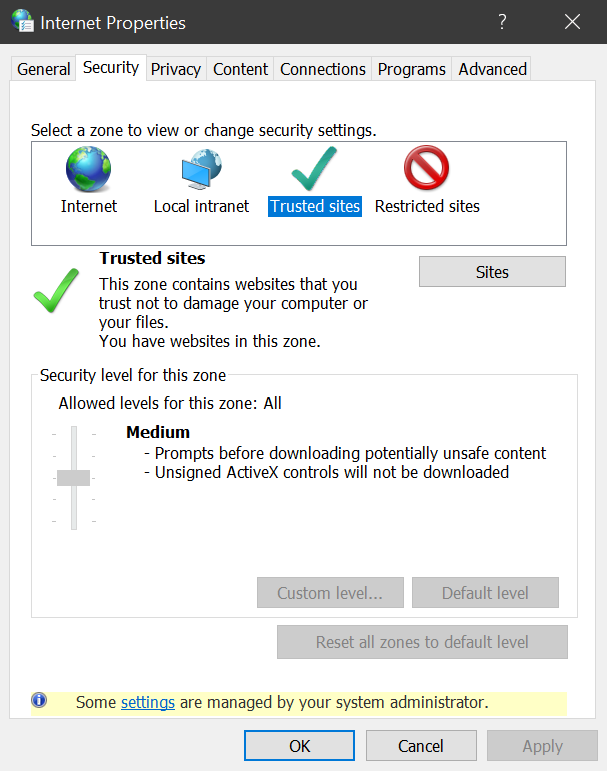
Windows Control Panel, Internet Options window, Security tab, Trusted Sites zone selected.
- Click the Sites button.

Trusted Sites window, with the list of RBA sites added
- Add the following sites to the list if any are missing.
- https://*.rits.anni.rba.gov.au
- https://*.rits.rba.gov.au
- https://pki.rits.rba.gov.au
- https://rits.anni.rba.gov.au
- https://dr.rits.anni.rba.gov.au
- https://rits.rba.gov.au
- https://dr.rits.rba.gov.au
If you have added the required sites to the Trusted Sites list, but still the Test Card and other RITS web pages do not report or appear to be running in the Trusted Sites Zone, try:
- Close the browser.
- Delete all of the sites in the Trusted Sites list.
- Close then reopen the Internet Options window.
- Add the sites back to the Trusted Sites list.
- Reopen the browser.
If you are trying unsuccessfully to run the Test Card via the ASX Net network, if you are able, you could also try to run the Test Card via the internet at https://www.rba.gov.au/rits/testcard.
If you are accessing the RITS Test Card via the Internet (https://www.rba.gov.au/rits/testcard), as opposed to via the ASX Net network, you will need to uncheck the setting 'Require server verification (https:) for all sites in this zone' and add https://*.rba.gov.au (or https://www.rba.gov.au) to the Trusted Sites list.
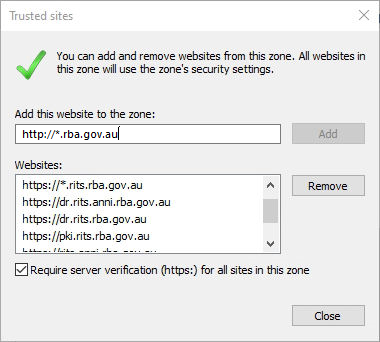
Trusted Sites window, with the list of RBA sites added.
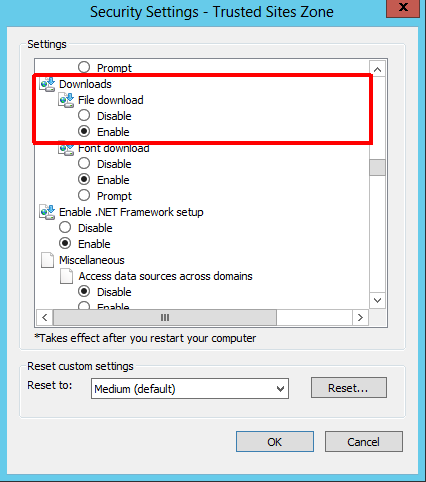
Follow the instructions below to set or check the required settings. Alternatively, you can set the level for the Trusted Sites zone to Medium-Low or Low. This should set most of the required settings to Enabled, you should then try running the RITS Test Card to check your settings.
- From the Windows Control Panel, select Internet options.
- Select the Security tab from the top row.
- Select the Trusted sites zone (the green tick).
Windows Control Panel, Internet Options window, Security tab, Trusted Sites zone selected.
- Click the Custom level... button.
Make changes to the settings as required.
| Section | Setting | Value |
|---|
| Downloads |
| File download | Enable |
| Miscellaneous |
| Websites in less privileged web content zone can navigate in this zone | Enable |
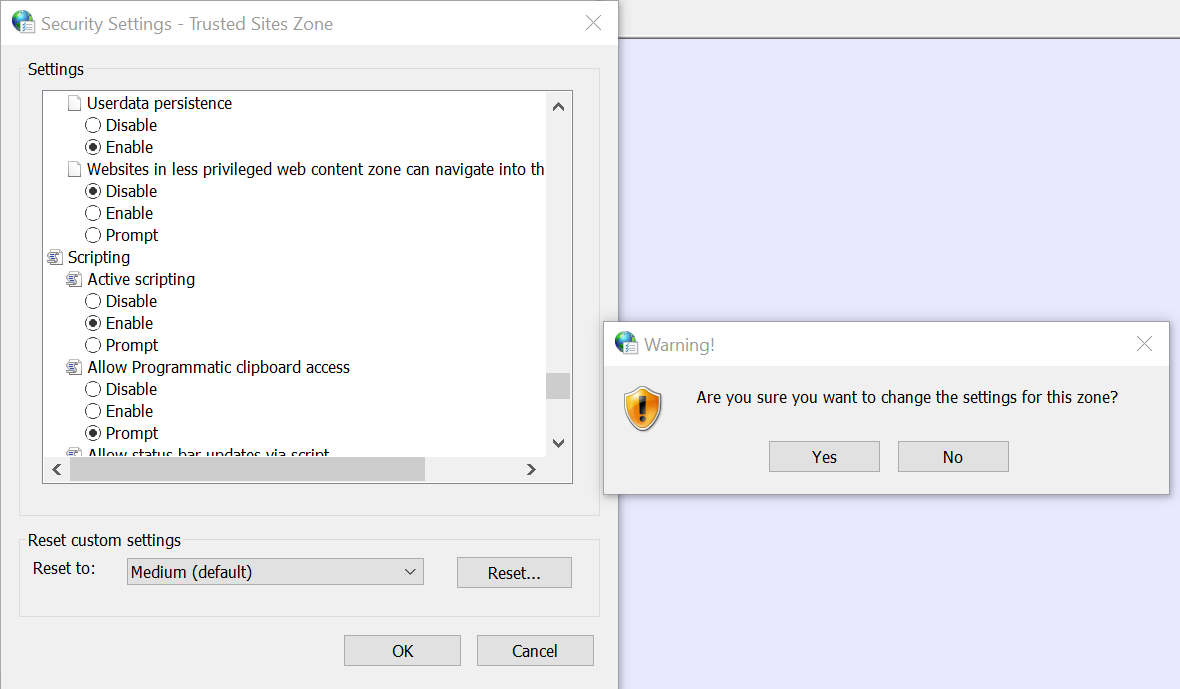
The images below have been modified to show the settings that you need to enable (you will find them interspersed among other settings.)
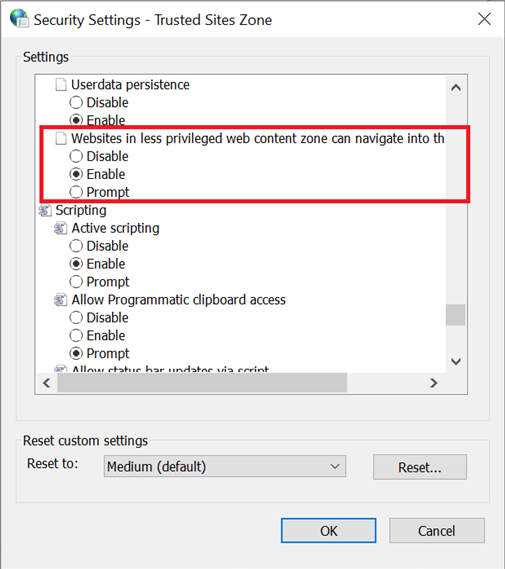
Security Settings for the Trusted Sites Zone, modified to show all of the required settings.
If one or more of your settings are greyed out and you are not able to change it, then it is likely that a group policy setting is overriding your local user setting preferences. You must ask your machine administrator to change the required setting for you.
Note: The setting shown in the Trusted Sites Zone dialog is your local user setting. The RITS Test Card and any sites in your Trusted Sites list will read and use the group policy setting which may be different.
If the user holds administrative privileges to change the internet option settings, then try toggling the setting from Disabled to Enabled. Then click OK. Click YES when prompted with the question: Are you sure you want to change the settings for this zone?
Security Settings for the Trusted Sites Zone, toggling screen

Security Settings for the Trusted Sites Zone, greyed out and administrator can only modify settings.
- From the Windows Control Panel, select Internet options.
- Select the Advanced tab from the top row.
- Please check both the Use HTTP 1.1 and Use HTTP 1.1 Through Proxy Connections options in the HTTP 1.1 settings section.
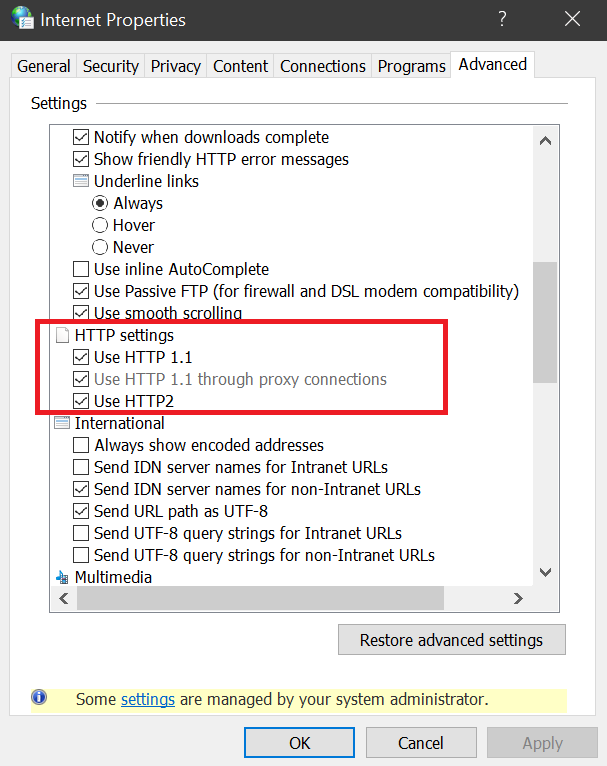
Windows Control Panel, Internet Options window, Advanced tab, showing HTTP 1.1 settings.
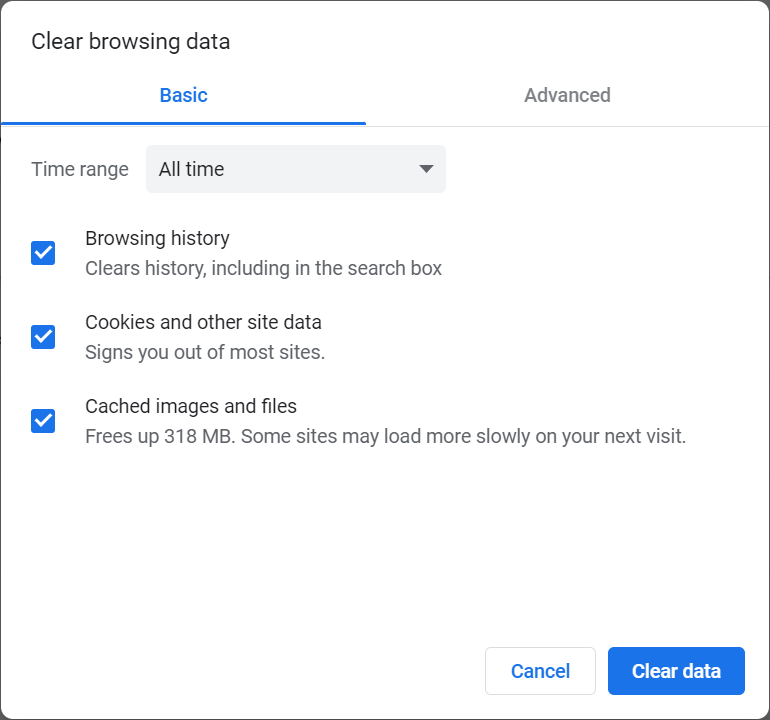
- Open the Delete Browsing History window:
- In the Microsoft Edge browser, go to the Settings menu (click on the gear icon), select Privacy, search and services, then click on the Choose what to clear button under the heading Clear browsing data. Under Time range, to delete all, select All time; and then select Browsing History, Cookies and other site data, and Cached images and files. Click Clear now.
- In the Google Chrome browser, go to the top right (click on the three dots), select More tools and then, Clear browsing data. Under Time range, to delete all, select All time, and then select Browsing History, Cookies and other site data and Cached images and files. Click Clear data.
- Make sure that Temporary Internet files and website files is checked, then press the Delete button.
Microsoft Edge Browser

Delete Browsing History window, with Temporary Internet files and website files option checked.
Google Chrome Browser
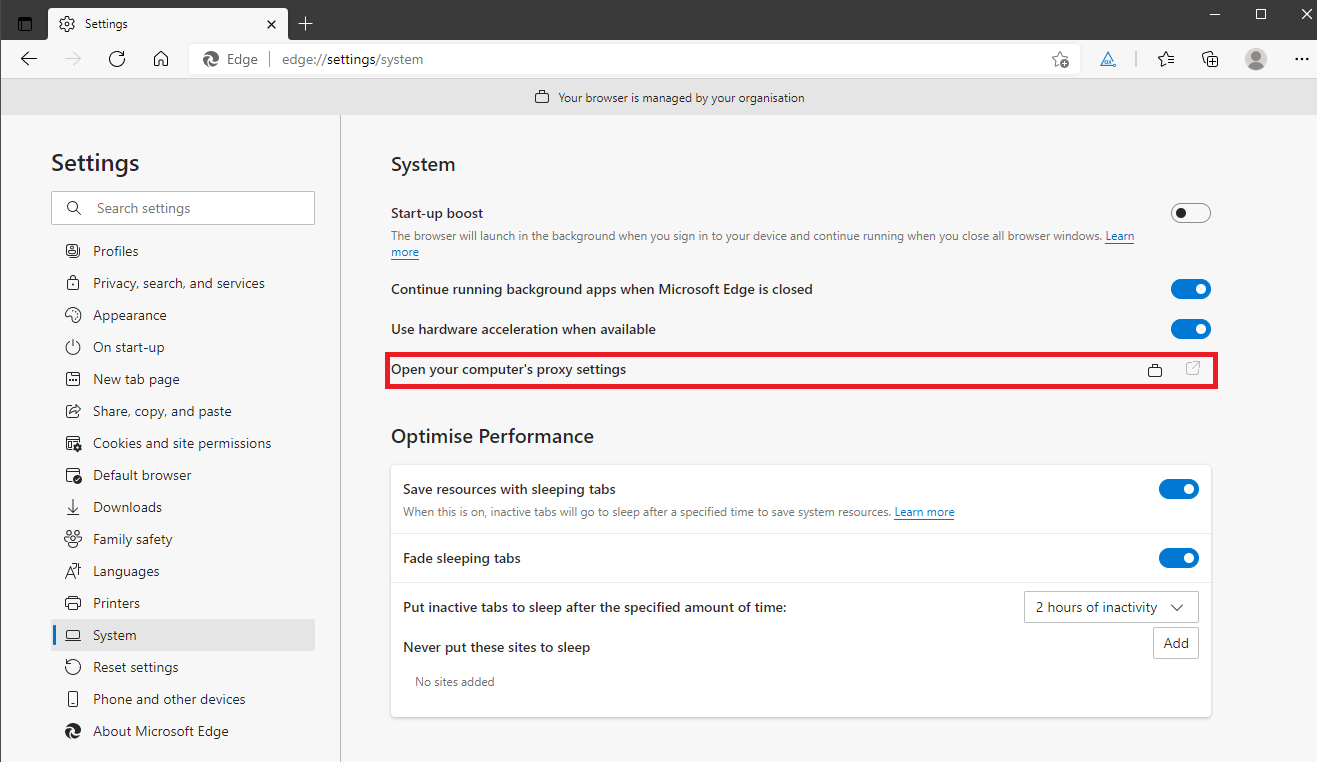
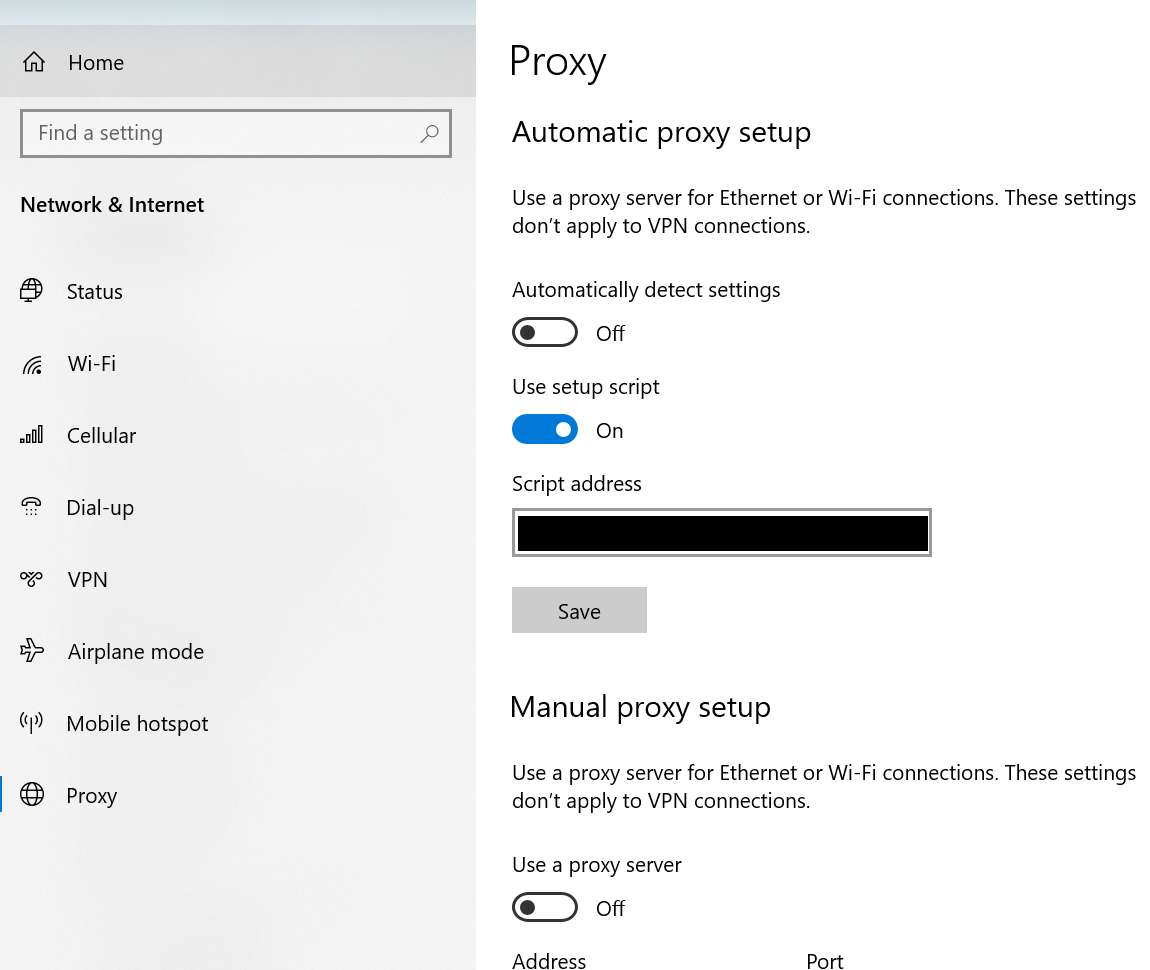
- Open the Settings – System menu (edge://settings/system).
- Select the Connections tab from the top row.
- Click Open your computer's proxy settings
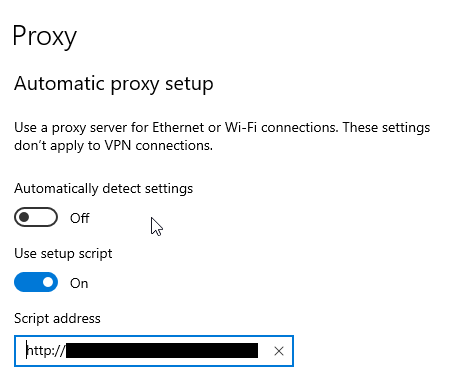
- Any proxy settings will be shown in the window.
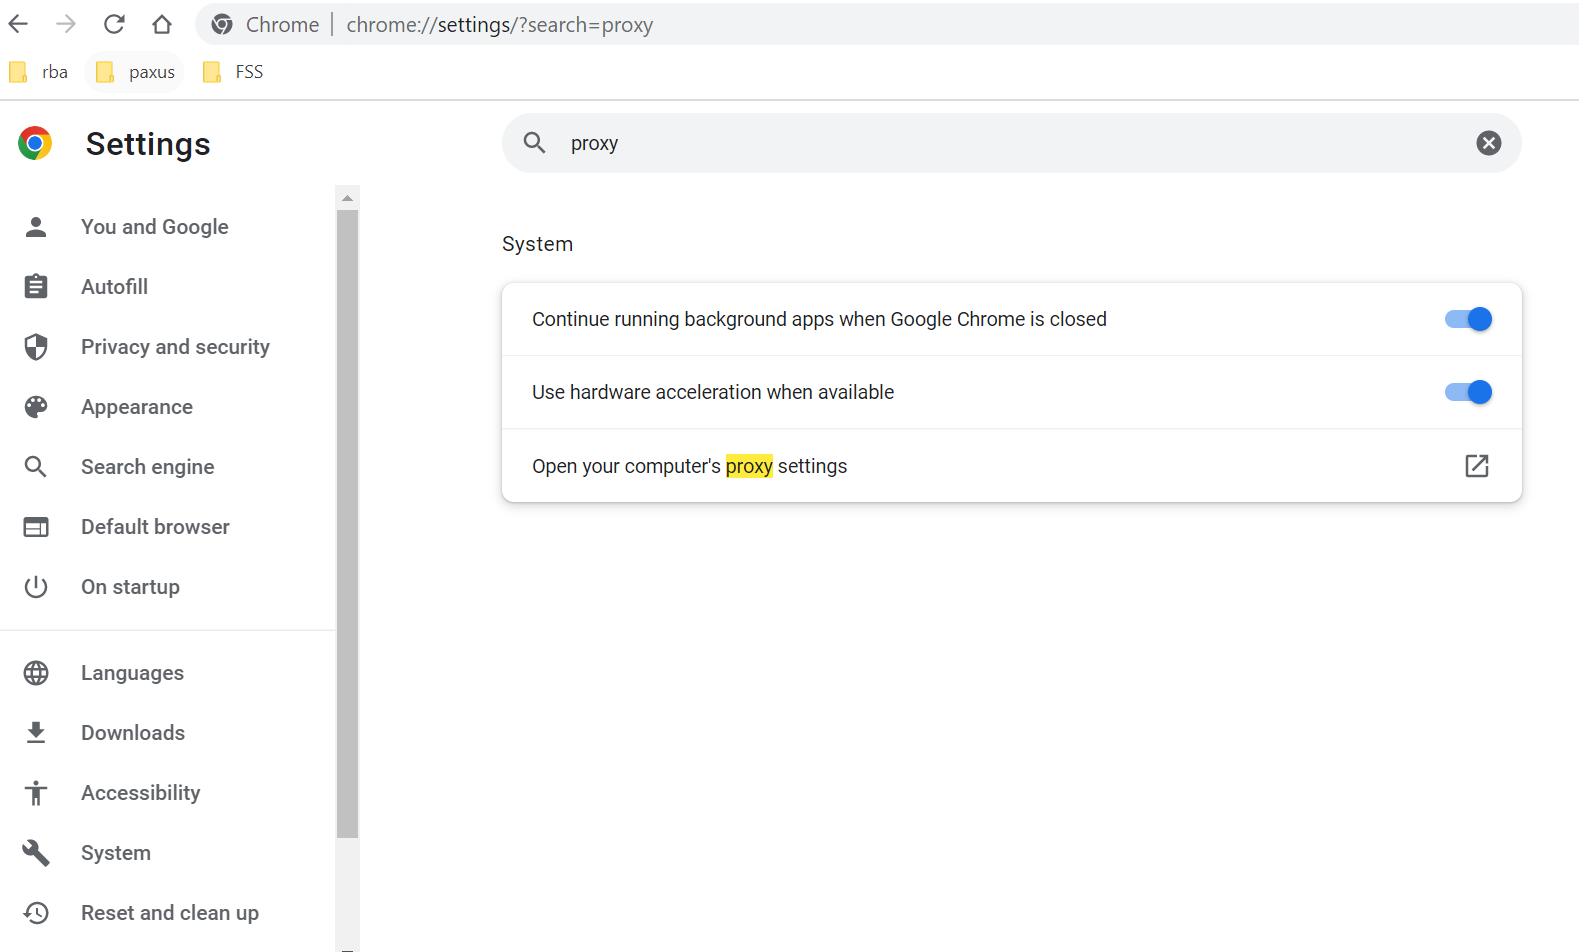
- Open Settings in Google Chrome
- Type in ‘proxy’ in the search field, then click the ‘Open your computer's proxy settings’ button
- Any proxy settings will be shown in the window.
If the browser’s pop-up blocker is enabled or configured at a high blocking level, the RITS login page may be prevented from being displayed. Follow the steps below to disable or lower the blocking level of the Pop-up Blocker.
- From the Windows Control Panel, select Internet options.
- Select the Privacy tab from the top row.
- To disable the Pop-up Blocker, uncheck the checkbox next to the option Turn on Pop-up Blocker.
- To lower the blocking level, click the Settings button in the Pop-up Blocker section.
- Under Blocking level at the bottom of the window, select the option Low: Allow pop-ups from secure sites.
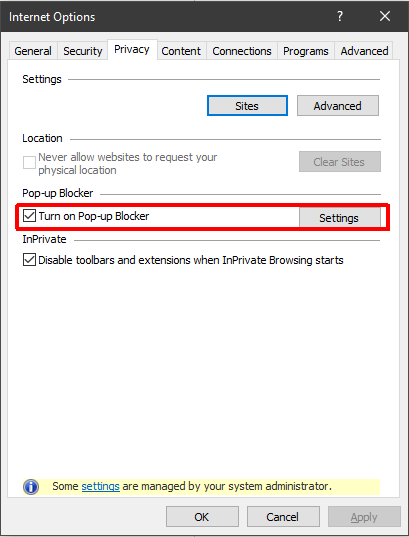
Windows Control Panel, Internet Options window, Privacy tab.
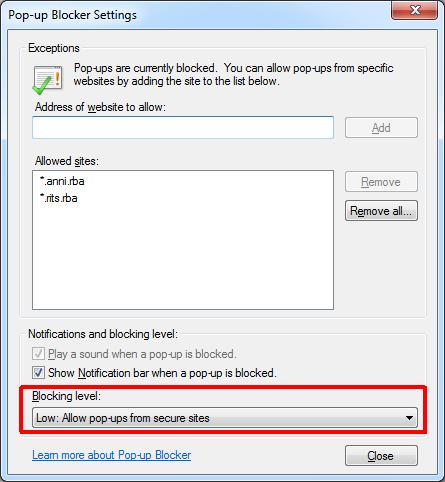
Pop-up Blocker Settings, with a low blocking level.